
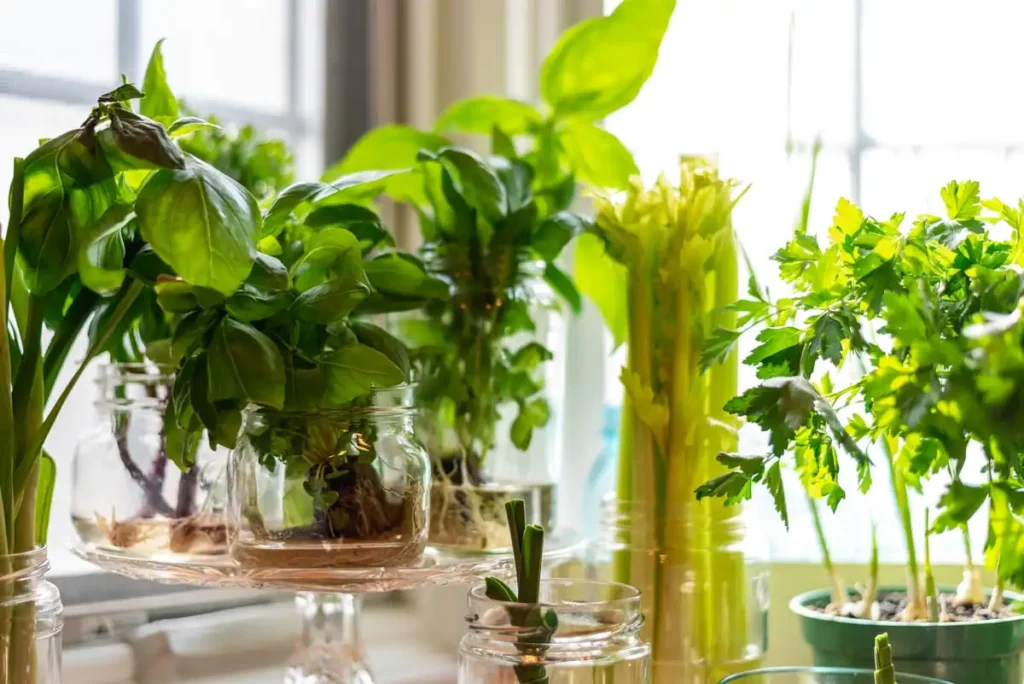
To start an indoor vegetable garden, make sure your plants get at least 4 to 6 hours of direct sunlight per day or install LED grow lights on a timer. Begin with leafy greens and herbs in containers with drainage holes, fill them with indoor potting mix and water the plants once the top inch is dry. Lettuce and other leafy vegetables can be harvested in 4 to 6 weeks.
Your first garden does not require any expensive equipment. A window box, a bag of potting mix and two packs of seeds will cost approximately $20 right now. Below, you will see what to plant, how many hours of light each type of plant needs, what equipment is worth investing in and the common mistakes that kill most first gardens.
Can You Really Grow Vegetables Indoors?
Yes, but light determines which plants will thrive. Leafy vegetables, herbs, microgreens and scallions are suitable for indoor planting. Tomatoes, peppers and strawberries can also work, but only with strong grow lights and hand pollination of the flowers.
The problem is that a space that seems bright enough to us is shade for most food plants. Outdoors, a tomato gets 6 to 8 hours of direct sun, but even a south-facing window provides much less light from fall to spring because of shorter days and the lower position of the sun.
Be honest about money, too. Growing vegetables indoors won’t replace your grocery run. It pays off with crops that are pricey per ounce and grow fast: herbs, salad greens, microgreens and scallions. So think of an indoor vegetable garden as a steady supply of fresh greens and herbs, plus a few fun experiments.
What You Need for an Indoor Vegetable Garden
Here’s the short list for a basic indoor vegetable garden. If you’re working out how to start an indoor garden on a small budget, the first five items are enough.
| Item | Why you need it | Budget pick |
|---|---|---|
| Light | The biggest factor in what grows | A sunny south window or LED grow light strips |
| Containers with drainage holes | Soggy roots rot fast indoors | Plastic window boxes with trays |
| Indoor potting mix | Light, drains well and has no weed seeds | A 6-quart bag fills about four 6-inch pots |
| Seeds or starter plants | Greens and herbs grow fastest | Loose-leaf lettuce, kale and basil |
| Trays or saucers | Protect floors and sills | Usually included with window boxes |
| Outlet timer | Keeps light hours steady | 24-hour mechanical timer |
| Liquid fertilizer | Plants you harvest often need regular food | Any balanced liquid feed at half strength |
| Small fan | Moves air and cuts down on mold and pests | A clip-on fan on low |
Skip garden soil from outside. It packs down in pots, drains badly and can bring pests into your home. Our guide to potting soil vs garden soil explains the difference. With these basics in place, your indoor veggie garden is ready to plant.
How to Start an Indoor Vegetable Garden in 7 Steps
If you’re wondering how to start an indoor garden that actually produces food, follow these steps in order. Most people skip the first one and pay for it later.
Step 1: Check Your Light
Light makes or breaks an indoor vegetable garden, so watch your window for a full day. Count only the hours when the sill gets direct rays of the sun, not the hours the room feels bright. Herbs and leafy vegetables require a minimum of 4 to 6 hours of direct sunlight per day, and fruiting plants require more.
The best window orientation in the US is south. East- and west-facing windows can grow leafy greens during summer but are insufficient during winter, and north-facing windows lack the light vegetables need. Seedlings that lean toward the glass are asking for more sunlight.
Step 2: Add Grow Lights if Your Window Falls Short
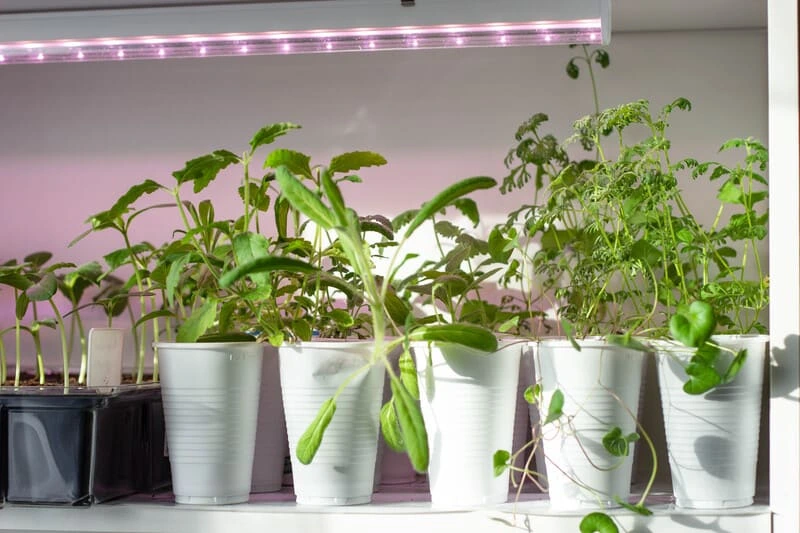
Most people growing vegetables indoors need grow lights for at least part of the year. LED strips are easy to use. They generate minimal heat, use little energy and can be plugged into a standard outlet. Full-spectrum white LED lights look natural in the kitchen and work well for vegetables.
The University of Tennessee Extension lists the light levels needed by various vegetables when lights operate for 16 hours a day:
| Crop | Light needed (footcandles, 16 hours a day) |
|---|---|
| Baby greens and seedlings | 1,000 |
| Small head lettuce (bibb) | 1,400 |
| Basil | 1,400 |
| Strawberries | 2,000 |
| Compact tomatoes | 2,400 |
Tomatoes require over twice the amount of light that baby greens need, which explains why greens are an easy choice. Lights should be on 12 to 16 hours per day for greens and herbs and 14 to 16 hours for fruiting crops. Mount low-wattage LED strips 6 to 12 inches above the leaves and raise them as the plants develop.
Connect the lights to a timer, since plants require darkness too. Never look directly at bright LEDs, and if the lights are set up in your bedroom, set the timer so they’re off while you sleep.
Step 3: Choose Containers and Potting Mix
Every pot should have drainage holes. Choose the depth according to the crop:
- Microgreens and baby greens: 2 to 3 inches deep
- Lettuce, spinach, arugula and most herbs: 4 to 6 inches deep
- Kale, chard, radishes and baby carrots: 6 to 8 inches deep
- Dwarf tomatoes and peppers: 3 to 5 gallons of potting mix per plant
Fill each pot with moist potting mix up to half an inch from the top.
Step 4: Pick Crops You’ll Actually Eat
Space is your most limited resource, so ask yourself the following four questions:
- Is it going to thrive in my existing lighting conditions?
- Is it costly or quick to spoil at the store?
- Is it difficult to find in my area?
- Do I eat it every single week?
Crops that pass all four tests, like lettuce, basil, cilantro and green onions, should occupy the prime space in your garden. Dried beans, lentils and potatoes are inexpensive but require a lot of space for minimal reward, so buy those at the store and grow greens instead.
Step 5: Sow Seeds and Turn On the Lights
Consult the seed packet for planting depth. Most greens are planted about 1/8 to 1/4 inch deep. Sow the greens more densely than you would outdoors and eat the surplus plants you remove during thinning. The ideal temperature range is between 65°F and 75°F. Switch the lights on the day you sow, so the seedlings get light as soon as they sprout.
Step 6: Water and Feed Lightly
Push your finger into the soil. If the top inch is dry, water thoroughly until some water comes out the bottom, then empty the tray after 15 minutes. If it’s still moist, let it be. Leafy vegetables need consistently moist soil, while rosemary and thyme do well when they dry out a little more.
When the seedlings get their first true leaves, fertilize them every 2 to 4 weeks with half-strength liquid plant food. Leafy vegetables don’t require much feeding, and overfeeding will damage them sooner than underfeeding.
Step 7: Harvest Often
Pick the outer leaves of lettuce, kale and chard first and let the center keep growing. Snip herbs just above a pair of leaves so they branch out. Regular picking keeps plants producing longer, and that’s what makes an indoor vegetable garden worth the shelf space.
Best Vegetables to Grow Indoors
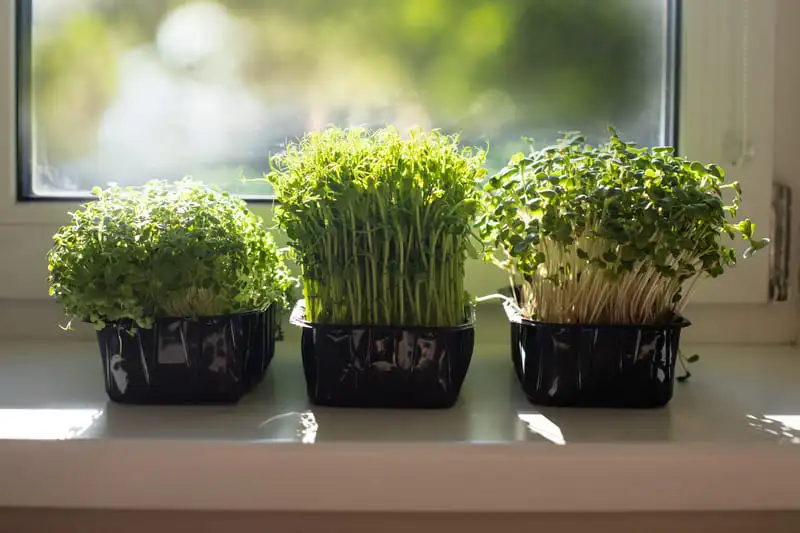
The best vegetables to grow indoors are fast, compact and fine with moderate light. Start at the top of this table and work down as your setup improves.
| Crop | Light needs | Container depth | Ready to harvest | Difficulty |
|---|---|---|---|---|
| Sprouts (in a jar) | None | Glass jar | 3 to 6 days | Easiest |
| Microgreens | Low to medium | 2 inches | 7 to 14 days | Easiest |
| Green onions (regrow from roots) | Medium | Glass of water or 4 inches of mix | About 1 week per regrowth | Easiest |
| Loose-leaf lettuce | Medium | 4 to 6 inches | 4 to 6 weeks | Easy |
| Arugula | Medium | 4 to 6 inches | 3 to 5 weeks | Easy |
| Spinach | Medium | 4 to 6 inches | 5 to 7 weeks | Easy |
| Kale and Swiss chard | Medium | 6 to 8 inches | 4 to 6 weeks for baby leaves | Easy |
| Radishes | Medium to high | 6 inches | 3 to 5 weeks | Moderate |
| Baby carrots | Medium to high | 8 inches | 7 to 9 weeks | Moderate |
| Dwarf cherry tomatoes | High | 3 to 5 gallons | 3 to 4 months from seed | Hard |
| Hot peppers | High | 3 to 5 gallons | 4 months or more from seed | Hard |
| Alpine strawberries | High | 6 to 8 inches | 4 months or more from seed | Hard |
While sprouts are one of the fastest vegetables to grow, eating them raw can be dangerous because of the risk of food poisoning, even when you grow them at home. According to Penn State Extension, young children, older people and those with compromised immunity should not eat sprouts raw.
What Vegetables Should You Not Grow Indoors?
Not all plants are worth the space they take up indoors. Corn, pumpkins, melons and winter squash require a lot of room to grow, as well as pollinators and full sun. Full-size (indeterminate) tomatoes keep growing up to 6 feet high, so choose dwarf or patio varieties. Potatoes, dried beans and lentils require deep pots and lots of light for several months before they produce a few dollars’ worth of vegetables.
Do not try to transplant root vegetables either, as radishes, carrots and beets do not like having their roots disturbed. Sow them straight into the container where they will grow.
Indoor Lettuce Garden: How to Grow Lettuce That Lasts
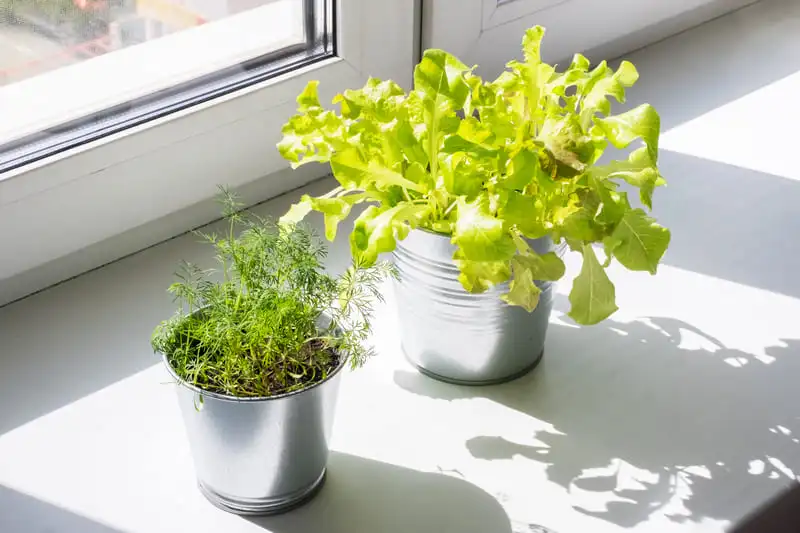
Lettuce is the crop most people start with, and it’s also the one that fails most often. An indoor lettuce garden works best when you treat lettuce like the cool, shallow-rooted plant it is.
Select loose-leaf varieties. Black Seeded Simpson, oakleaf varieties, mesclun blends and small butterheads such as Tom Thumb and Buttercrunch adapt to indoor lighting better than iceberg and romaine. Provide your plants with at least 12 hours of light daily. You may set a timer for 12 hours, though 14 to 16 hours will speed up growth. Keep lettuce at 60 to 70°F, as high temperatures from heater vents make it bitter and make it bolt.
The main reason most indoor lettuce does not survive beyond two to three weeks is that its shallow roots dry out fast, and people then overcompensate with too much water or fertilizer. Water in small amounts often to keep the growing mix moist, not soggy, and feed only once or twice a month with a half-strength solution.
Plant your seeds densely and harvest by cutting. At 4 to 5 inches of growth, cut the plants back to about 2 inches above the soil surface and they will grow back. You can continue harvesting this way every 10 to 14 days for about 3 months. Start a new container every 3 to 4 weeks so you always have one ready.
Shallow trays work well for growing lettuce indoors too. Sow densely in 2 to 3 inches of mix, cut the whole tray as baby leaves and let it regrow once. Either way, growing lettuce indoors comes down to consistency: the same light hours, the same moisture and cool, steady temperatures.
Tomatoes, Peppers and Other Fruiting Crops Indoors
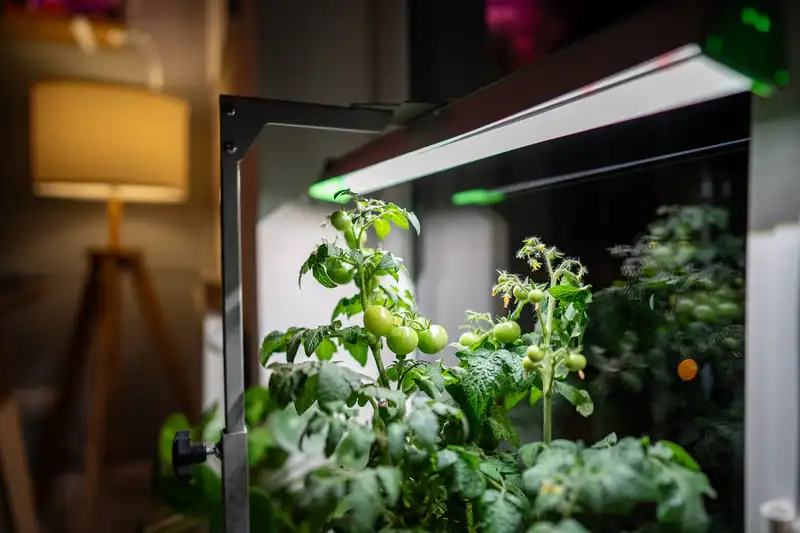
Fruiting vegetables are the more advanced stage. They require three things that greens don’t.
First is intense lighting for long periods of time. Plan on 14 to 16 hours per day, with the lamps placed close to the plants. A window will very rarely make a tomato produce fruit in winter.
Second is a compact variety. Choose dwarf and patio varieties bred for containers, like Tiny Tim or Red Robin tomatoes and small hot peppers. Provide each plant with a 3 to 5 gallon container and a small stake.
Third is your involvement in pollination, since indoors there is neither wind nor insects to carry pollen between flowers. Tomatoes and peppers self-pollinate, but their flower clusters still need a gentle shake once a day while they are in bloom. You can also touch the clusters with the back of an electric toothbrush. For strawberries and cucumbers, transfer pollen from flower to flower by hand with a small, soft paintbrush. There are also cucumber varieties that do not require pollination to produce fruit.
Keep your expectations realistic. A dwarf tomato in an indoor garden will give you a handful of cherry tomatoes at a time, not a bucketful. Switch to a bloom fertilizer once flowers appear.
Indoor Vegetable Garden Systems Compared
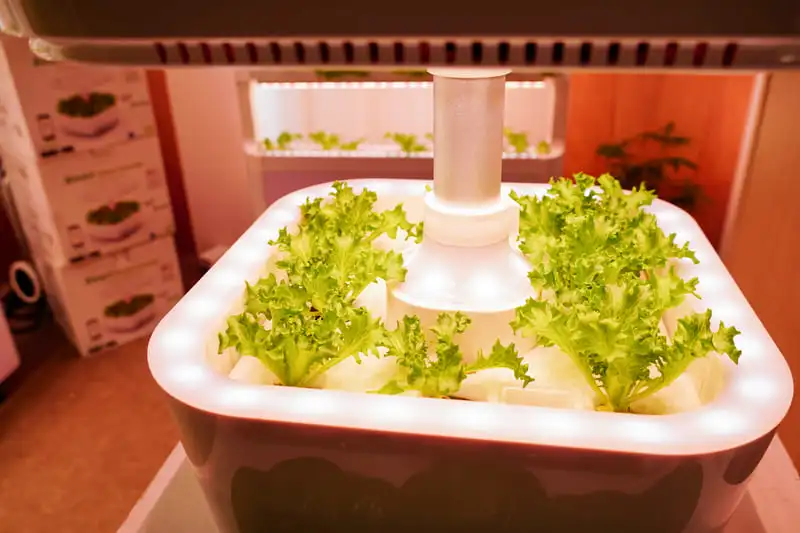
You don’t have to build an indoor vegetable garden from scratch. An indoor vegetable garden system puts the light, water and growing medium into one unit. Here are the three main routes:
| Setup | Examples | Plants | Best for | Watch out for |
|---|---|---|---|---|
| DIY shelf with LED lights | Wire shelf, LED grow strips, timer and window boxes | As many as fit | Most growing space per dollar | Takes an afternoon to set up |
| Countertop smart garden | Click & Grow Smart Garden 3, AeroGarden Harvest | 3 to 9 | Herbs and a few greens on the counter | Small yield, pods cost extra |
| Vertical hydroponic tower | Lettuce Grow Farmstand Nook, Gardyn Home 4 | 20 to 30 | Households that eat salad every day | High price, needs a corner and an outlet |
Countertop gardens can serve as the easiest introduction to indoor gardening. The Click & Grow Smart Garden 3 holds three pre-seeded pods and uses just 8 watts of electricity. It’s ideal for growing basil and certain types of lettuce, but not for feeding an entire family. AeroGarden is also still around. The brand announced its shutdown at the end of 2024 but restarted operations in 2025 and now sells through ScottsMiracle-Gro, so its pods are still available.
An indoor hydroponic garden tower is the next step up. The Lettuce Grow Farmstand Nook holds 20 plants in under 4 square feet, and the Gardyn Home 4 fits 30 plants into a footprint 2 feet wide and 1 foot deep. Both are soil-free, so there’s no dirt on the floor and growth is fast. A tower is also the easiest way to run a big indoor lettuce garden.
The trade-offs are cost and upkeep. Towers cost $799 to $899, while starter plants or pods are an ongoing expense. The water tank also needs regular cleaning to prevent algae and bacteria from building up. Gardyn’s membership ($29 to $39 a month) is optional, but features like Vacation Mode are included with it.
So is an indoor hydroponic garden worth it? If convenience matters more than cost, yes. If you want the most food for the least money, a DIY shelf wins. Whichever indoor vegetable garden system you choose, make sure replacement pods, seeds or nutrients are easy to buy first.
How Much Does an Indoor Vegetable Garden Cost?
An indoor vegetable garden can cost about $20 or close to $900. Here’s what four common setups cost to buy and run. Prices were checked in November 2026 at major retailers and brand websites. Electricity is figured at 18.2 cents per kWh, the 2026 national average from the U.S. Energy Information Administration.
| Setup | What’s included | Upfront cost | Electricity per month |
|---|---|---|---|
| Windowsill starter | 17-inch window box with tray ($9.99), 6-quart bag of indoor potting mix ($5.97 to $7.39), lettuce and kale seeds ($1.96 each) | About $20 to $21 | $0 |
| DIY shelf with LED lights | 3-tier wire shelf ($35.88), 2-foot LED grow light 8-pack, 80W total ($89.99), 24-hour outlet timer 2-pack ($10.99), 3 window boxes ($29.97), 2 bags of potting mix ($11.94 to $14.78), 4 seed packets ($7.84) | About $187 to $189 | About $6.12 (lights on 14 hours a day) |
| Countertop smart garden | Click & Grow Smart Garden 3, plus refill pods at $11.96 to $14.95 per 3-pack | $99.96 on sale, $124.95 regular | About $0.70 (8W, 16 hours a day) |
| Vertical hydroponic tower | Lettuce Grow Farmstand Nook ($799, starter plants from $29.99 for 6) or Gardyn Home 4 ($899, optional membership $29 to $39 a month) | $799 to $899 | About $6.99 for the Gardyn (80W, 16 hours a day) |
The windowsill box is the least expensive option for testing whether or not you like growing your own food. The self-built shelf will give you the most growing space for your money and will cost about the same to operate as a tower.
Apartment Indoor Vegetable Garden Ideas for Small Spaces
An apartment indoor vegetable garden has to fit around real life: one decent window, no drilling and a landlord who’d rather not find water stains. These setups work in small spaces:
- Place a freestanding wire shelf next to your best window. A 3-tier shelf about 2 feet wide will fit into a 3-foot opening, hold 3 window boxes and doesn’t require wall mounting. Secure LED strips under each shelf with zip ties.
- Create a growing area out of an unused closet. Cover the back wall with white foam board or reflective Mylar, put a waterproof liner on the floor and run the lights on a timer. Get a small fan to keep the air circulating.
- Line the windowsill with window boxes. Two window boxes of greens on a south-facing sill will provide you with salad toppings without using any electricity.
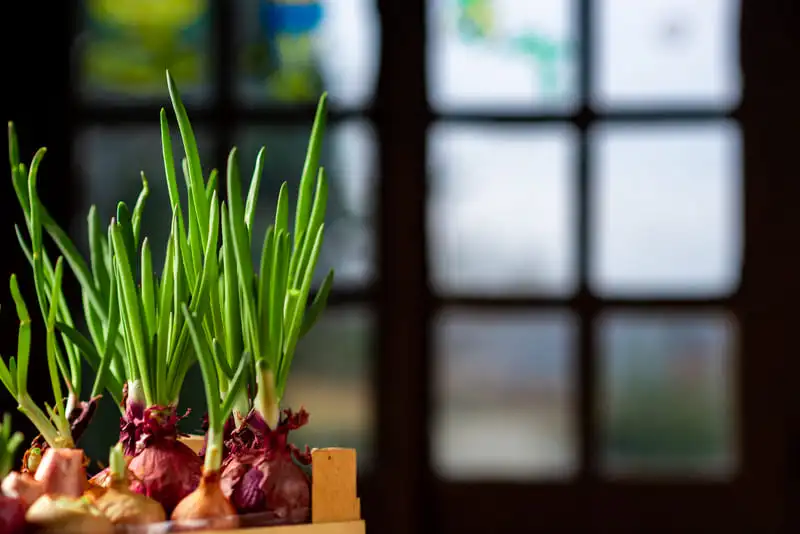
- Regrow green onions. Stand the root ends of store-bought green onions in a glass with just enough water to cover the roots. Change the water twice a week and harvest new shoots in about a week. After a few rounds, plant them in potting mix.
The other major concern is being away for a week or two. Give your plants a good soak the day you leave, and move them a bit farther away from the light source so they dry out more slowly. Self-watering planters and wick systems, where a cotton cord runs from a container of water into the pot, can carry plants through about two weeks.
With one shelf and a timer, an apartment indoor vegetable garden can keep producing all year, even in a studio.
Indoor Herb Garden With Grow Lights: The Easy Add-On
Herbs are the natural partner to any indoor veggie garden, and they often pay for themselves fastest. Basil, parsley, cilantro, chives, mint and thyme all grow well on the same shelf as your greens. If you’ve been wondering how to start an indoor herb garden, the setup is the same: containers with drainage, potting mix, 10 to 14 hours of light and a sharp pair of scissors. Our full guide to an indoor herb garden with grow lights covers light hours, bulb types and the easiest herbs to start with.
Common Indoor Vegetable Garden Mistakes
Most of these show up in the first month of a new indoor vegetable garden, and all of them are easy to fix.
- Overwatering. More indoor plants die from soggy mix than from underwatering. Inspect the top inch of soil before watering.
- Wrong light placement. Tall, pale and floppy seedlings are a sign that the light is too weak or too far away. Move the light closer.
- Insufficient airflow. Stagnant air invites mold and pests. A fan on low for a few hours a day does the trick.
- Overfertilizing greens. Brown, crispy leaf edges are a sign of too much fertilizer.
- Repotting fruit-bearing plants mid-season. Moving fully grown tomatoes and peppers into bigger pots can leave the roots wet until they rot. Repot only when the roots have filled the pot, and water lightly for one week after repotting.
- Not cleaning the tank. In any hydroponic system, clean the tank and replace the solution according to the manufacturer’s instructions.
- Missing pests early on. Look under the leaves once a week. Fine webbing usually means spider mites, and flies hovering around the wet mix are probably fungus gnats. Here’s how to get rid of flying bugs on indoor plants.
FAQ
Yes, if you use grow lights. Window light drops from fall through spring, so a window-only garden slows down in winter. An indoor vegetable garden on a 14 to 16 hour light timer grows at the same pace every month. Sow new lettuce every 3 to 4 weeks and your indoor lettuce garden never runs out.
What is the 70/30 rule in gardening?
It’s an outdoor design principle. About 70% of the garden should have proven or structural plantings (or native plants, in another version of the rule), while 30% should have plantings that change with the season. This also works indoors. About 70% of your shelf should hold plants that have a good chance of success (greens and herbs, for example), and 30% can be experiments, like a dwarf tomato or pepper.
Are indoor hydroponic gardens worth it?
They’re worth it for the convenience: you don’t need soil, there is less mess and you get a steady supply of fresh greens. They are not a money-saver, since you will keep spending money on new pods, nutrients and in some cases memberships.
To get the best bang for your buck, choose a self-built shelf with LED lights.
What is the easiest vegetable to grow indoors for beginners?
Microgreens. They need 2 inches of mix, modest light and one to two weeks, which puts them at the top of most lists of the best vegetables to grow indoors. Loose-leaf lettuce and regrown green onions come next.
Your First 30 Days
- Week 1: Set up the window box or shelf, set the timer and plant lettuce, arugula and a tray of microgreens.
- Week 2: Harvest your microgreens. Thin out the lettuce and enjoy the thinned-out plants.
- Week 3: Begin feeding at half strength and plant another round of lettuce.
- Week 4: Harvest your first baby lettuce. Then decide on adding herbs, another shelf or even some fruiting experiments.
Come spring, the same shelf and lights are perfect for starting seedlings to move outside, and our guide on how to start a vegetable garden in your backyard picks up from there. Until then, your indoor vegetable garden can keep a fresh salad on the table every week.